Workflows
Use the full power of ADD.
Audio Bridge for Final Cut Pro
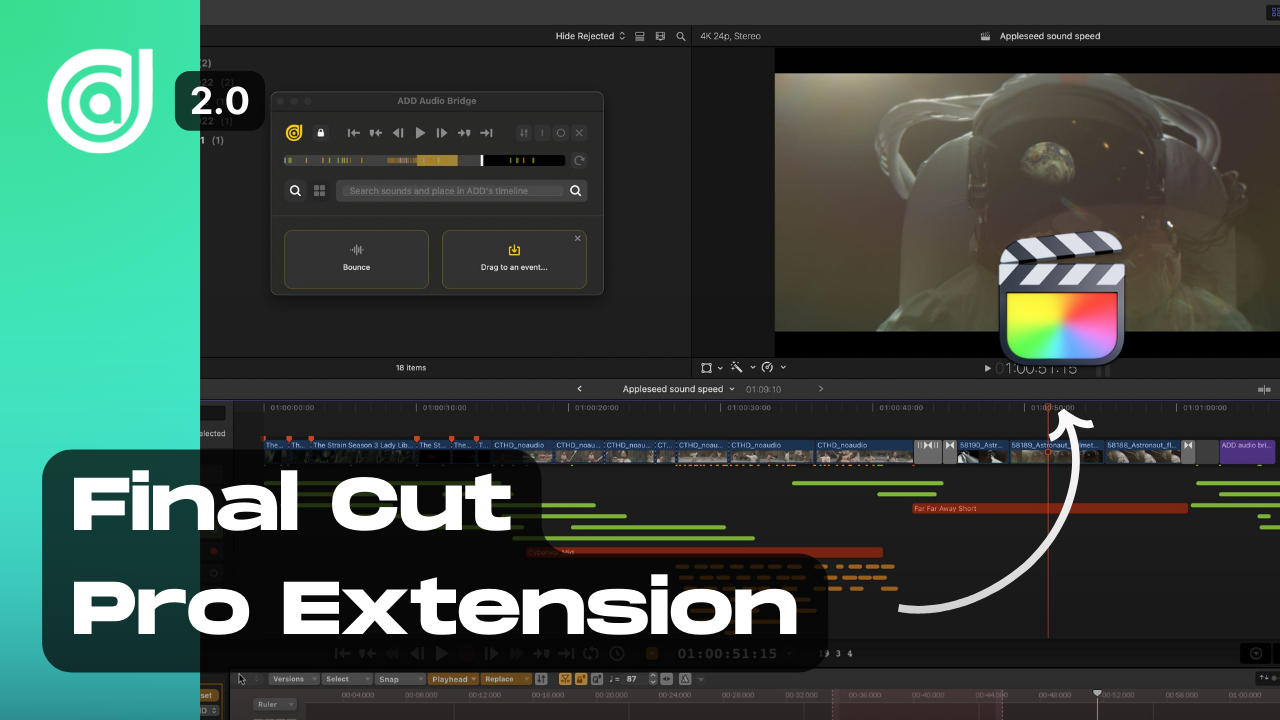
Use the full power of Audio Design Desk inside of Final Cut Pro. The extension links the two program’s timelines so they work seamlessly together.
Let us know what you think!
Open ADD Audio Bridge
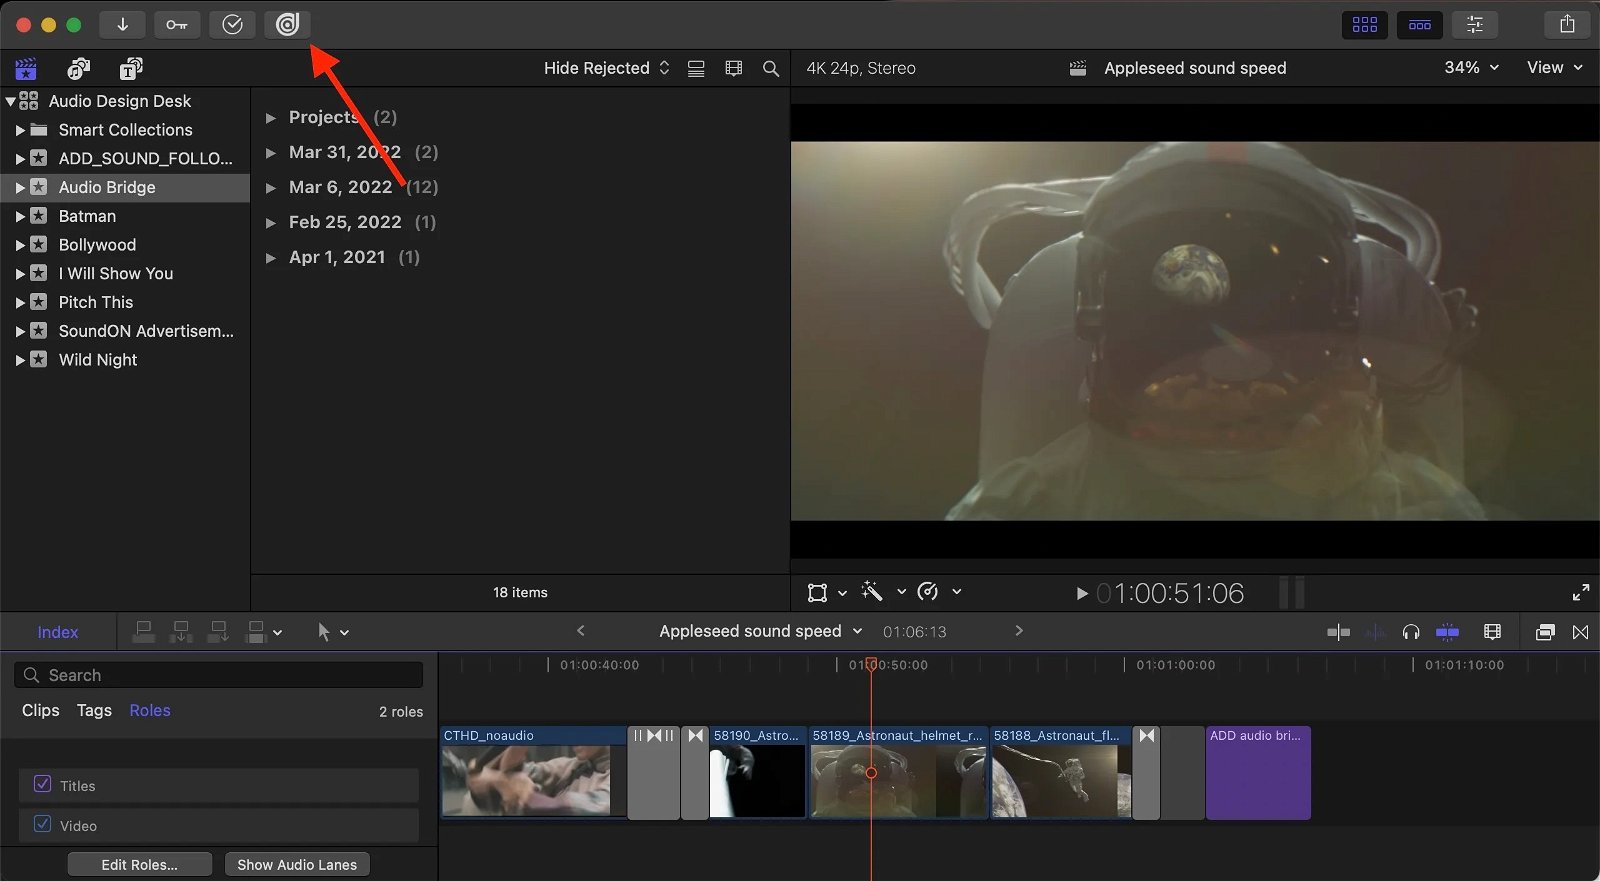
After installing Audio Design Desk and opening Final Cut Pro, you will notice the ADD icon in the upper left of the FCP window.
If you have multiple extensions installed, you will see the ADD icon in an extensions pulldown.
Press the icon to open the ADD Audio Bridge extension.
Open Audio Design Desk
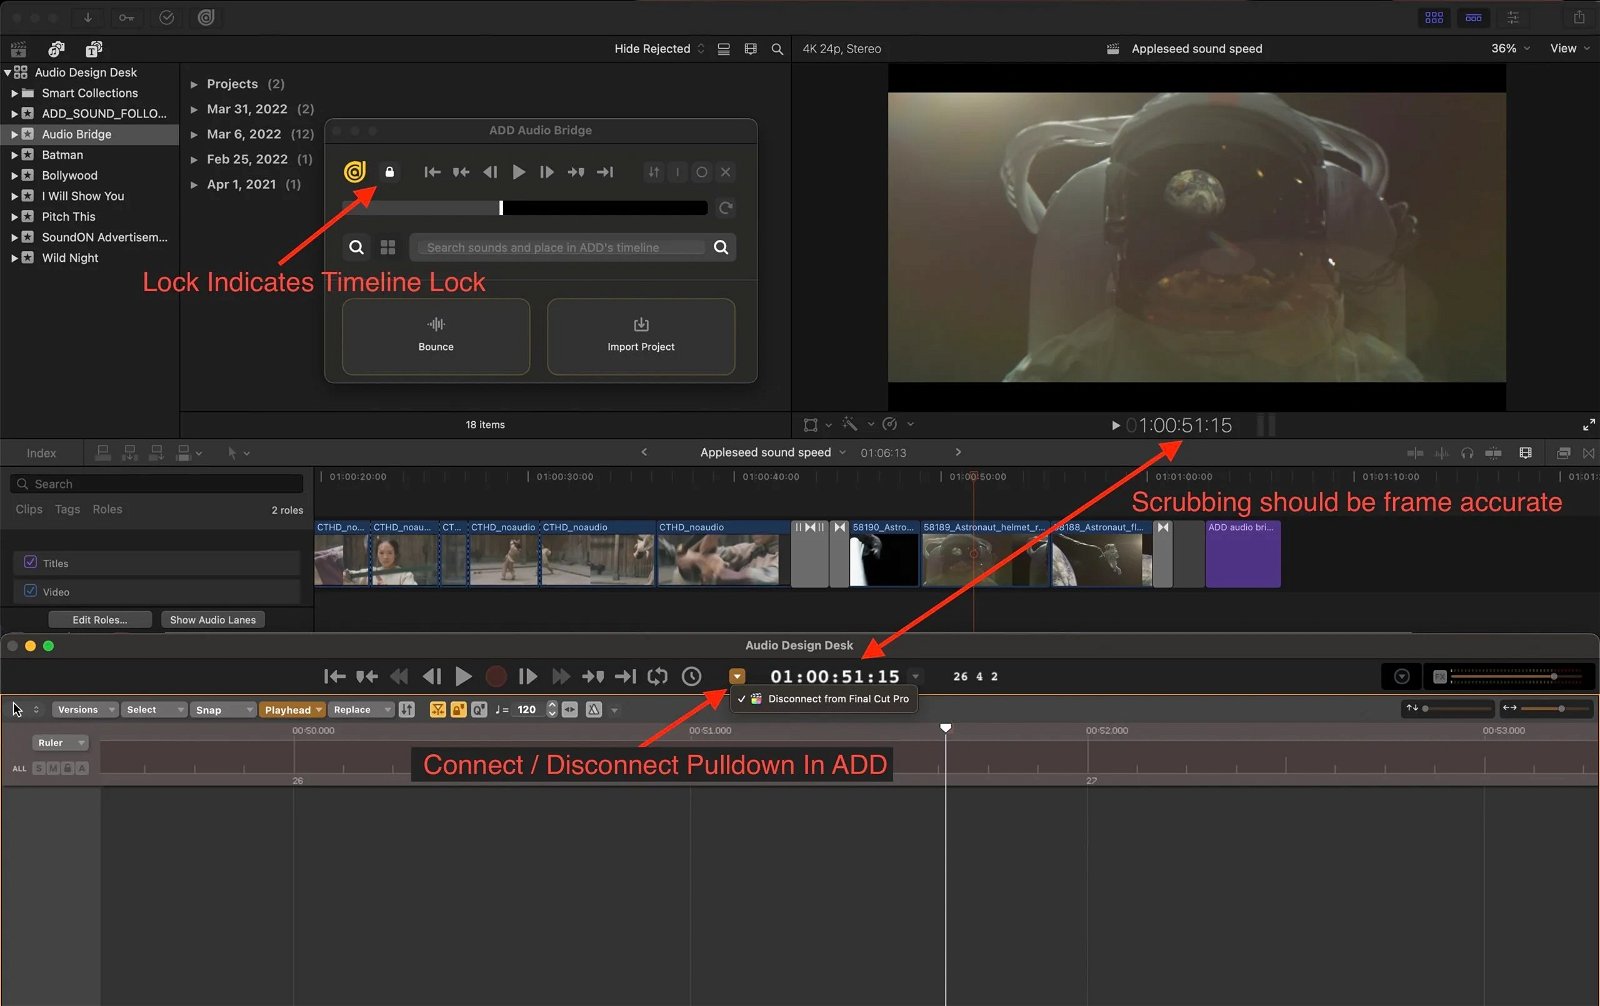
Click the ADD icon within the Audio Bridge to open Audio Design Desk. Once ADD is open, ADD and FCP will be connected. You can check by clicking the drop-down arrow next to the timecode in the Transport Bar. You will also see the lock icon highlighted in the ADD Audio Bridge.
Scrub in ADD or in the ADD Audio Bridge to control the Final Cut Pro timeline.
If you run into issues, make sure the start times of ADD and Final Cut Pro are the same. You can change the ADD start time by clicking on the triangle to the right of the timecode and typing in your desired start time.
To the left of the timecode is the Final Cut Pro Connect button. When connected, the triangle will glow orange.
Add Sounds
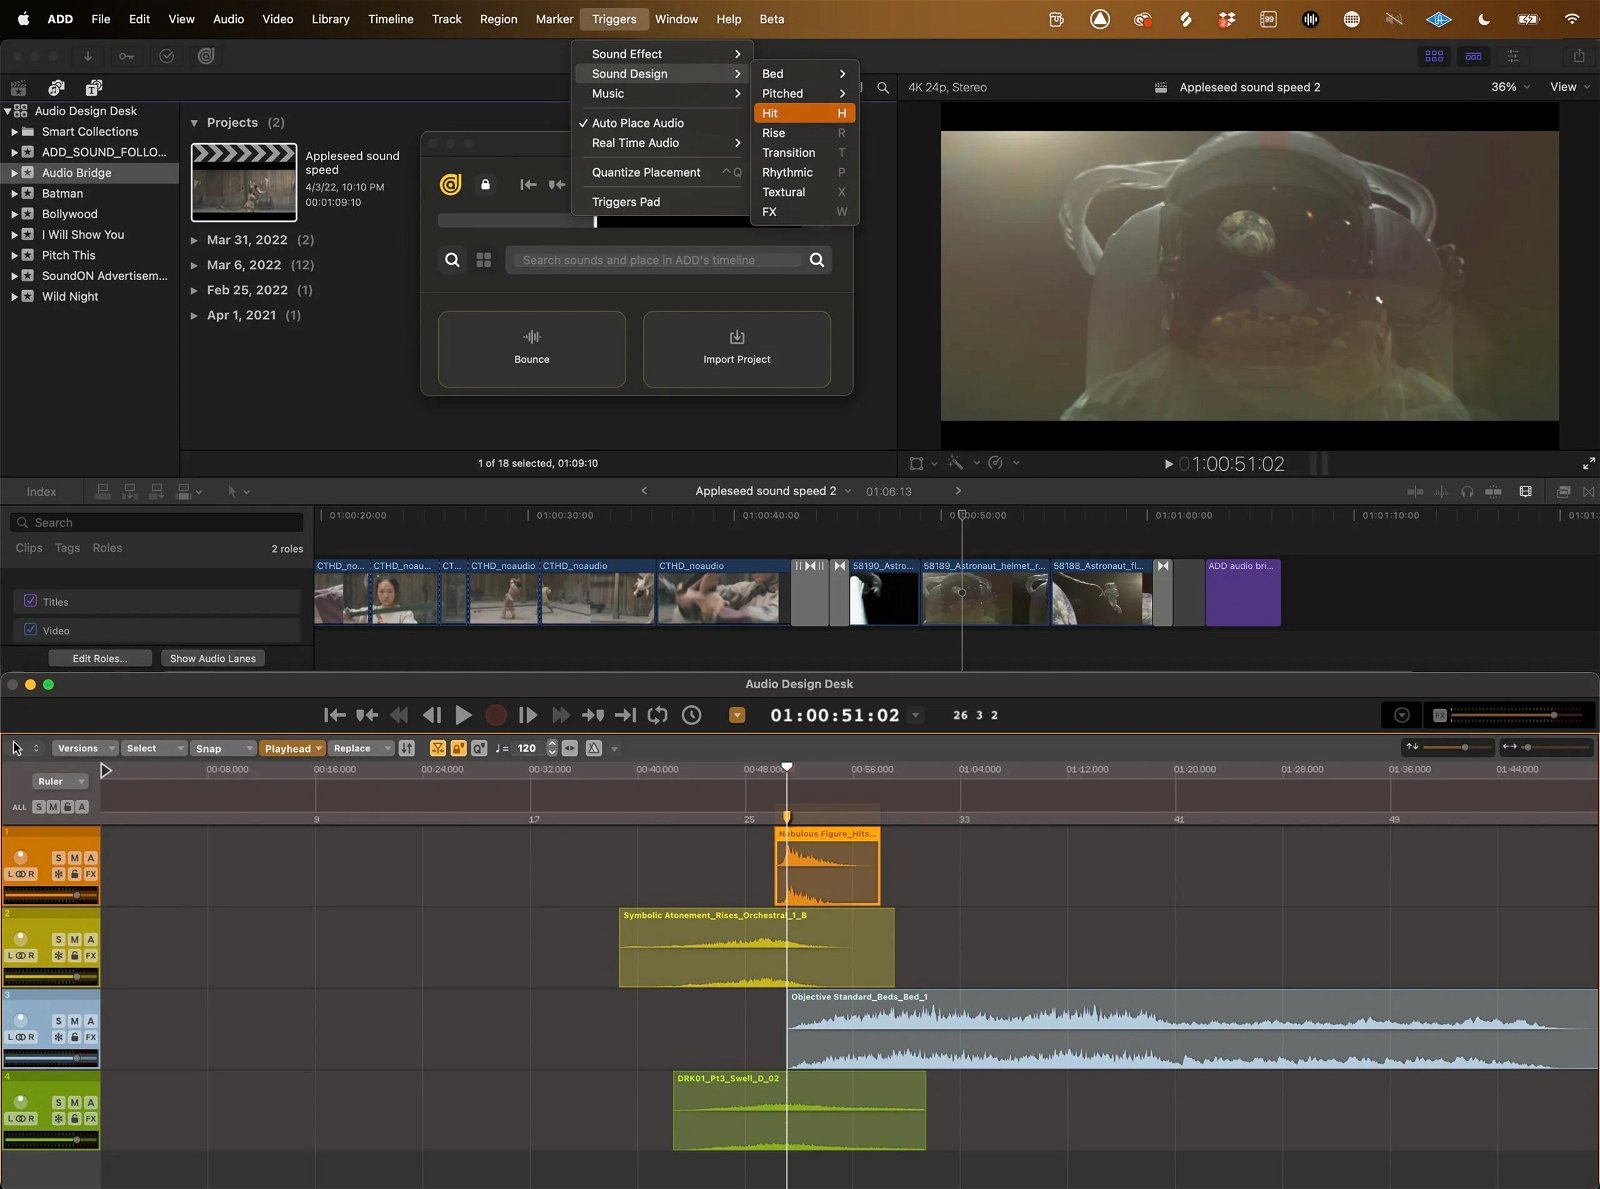
Once the timelines are linked, use ADD to add sound to your video.
Press H for hit, T for transition, R for rise and D for drone.
After you listen back, select all by pressing ⌘A and then replace by pressing ⌘R to try alternate sounds without losing sync.
You can create your own triggers by dragging sounds into the numbers or MIDI notes in the trigger menu below the library. Once you create a set of sounds on a Trigger, you can place sounds from that trigger to the ADD timeline by pressing the trigger. This can happen frame by frame or live, in real time.
Transfer
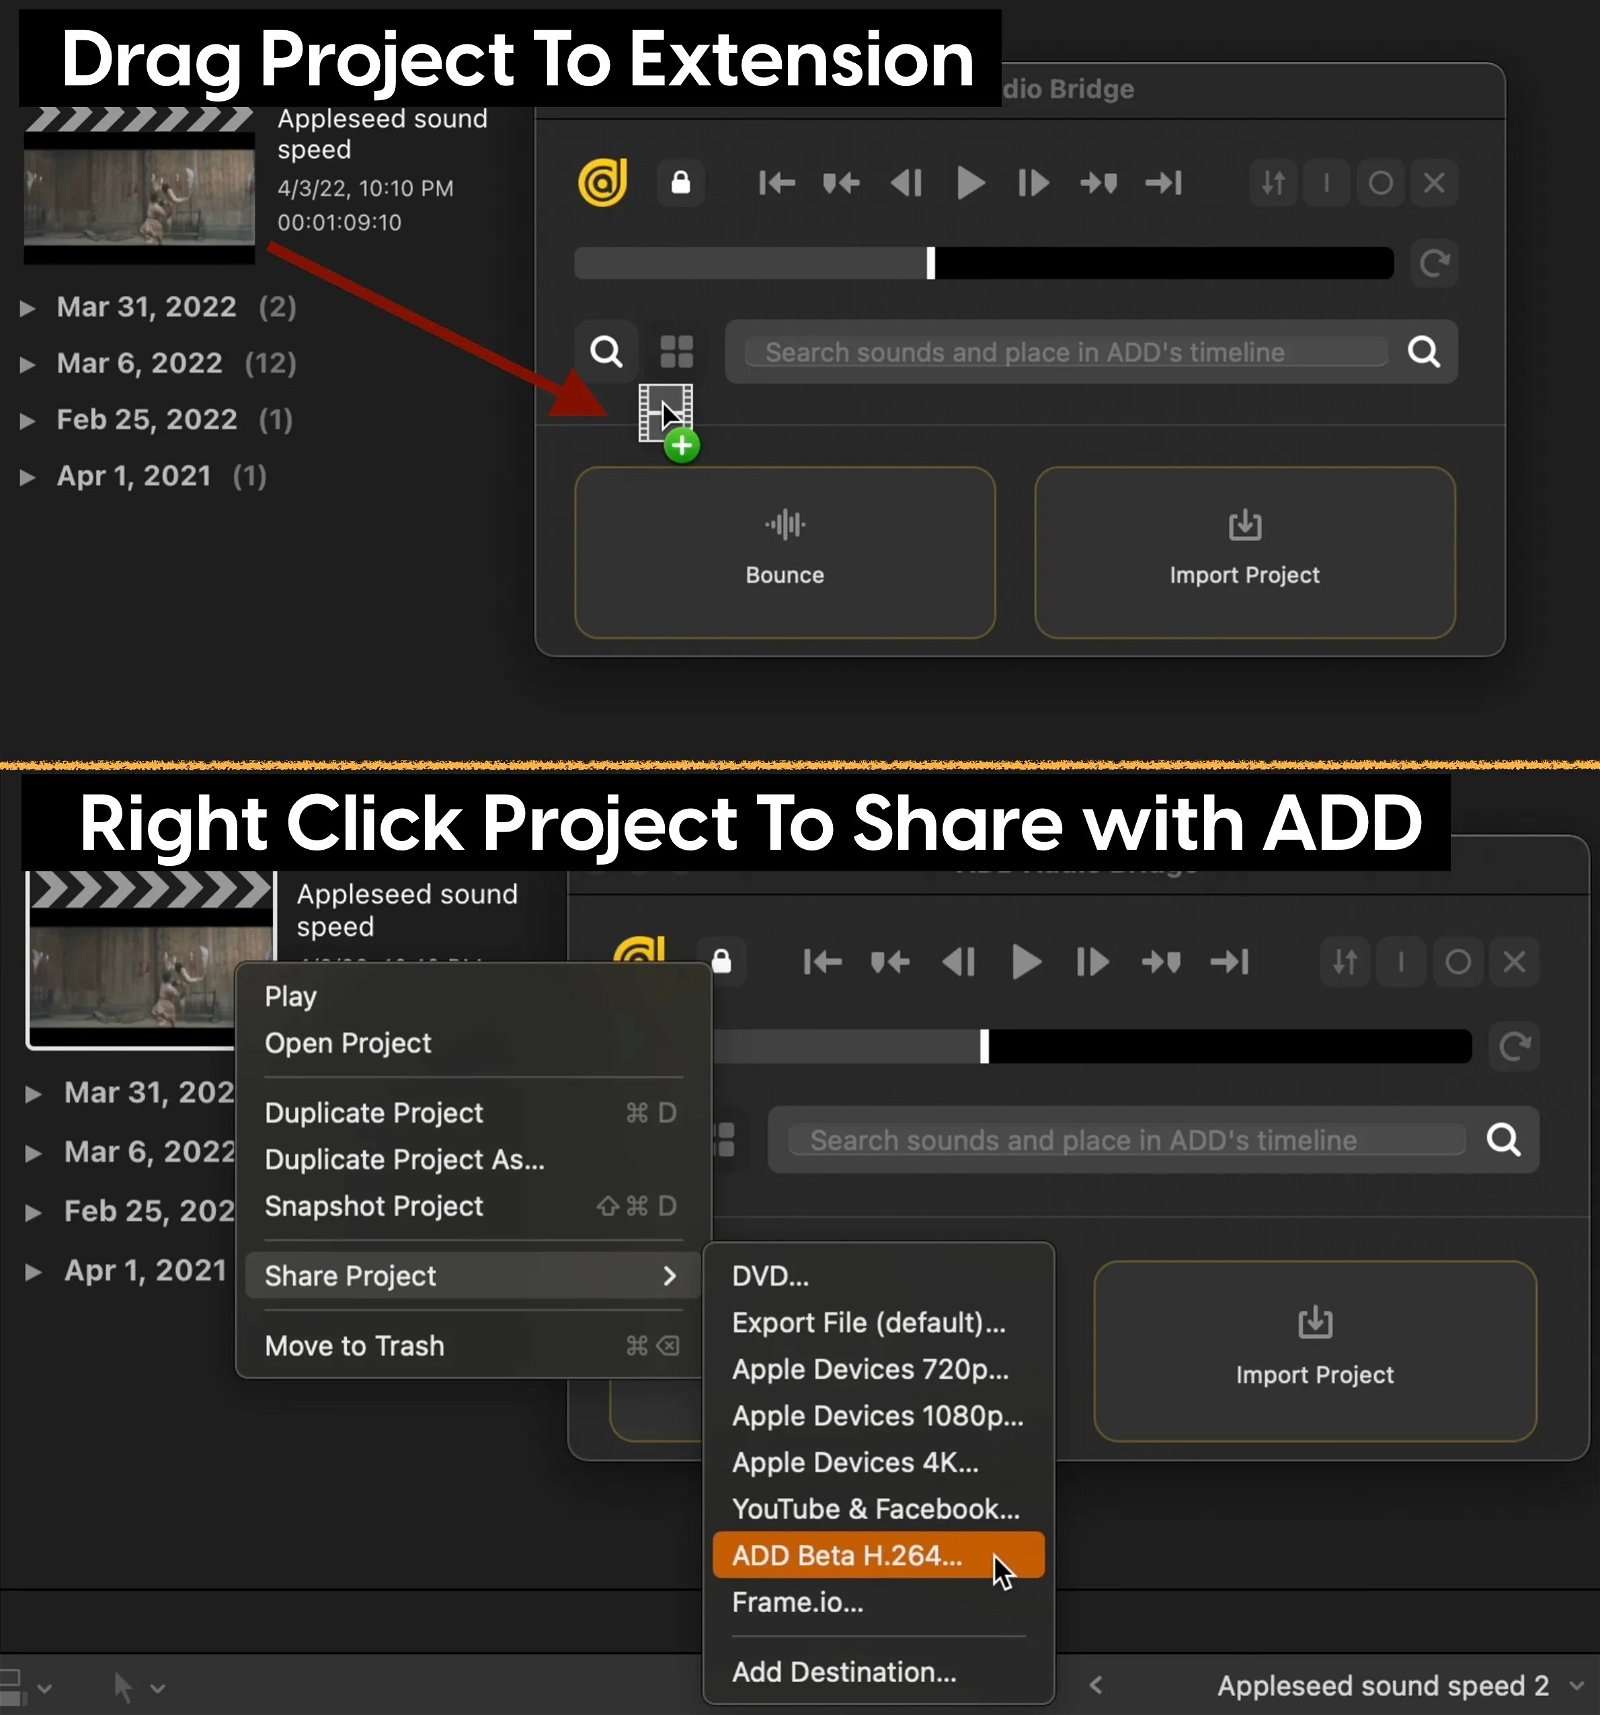
You can transfer session data from Premiere Pro to Audio Design Desk by selecting the menu at the top right of the Audio Bridge in ADD.
You can transfer Audio and/or Video from Final Cut Pro to ADD by right clicking a file or your entire project, navigating to the “Share” menu, selecting ADD from the pulldown and then selecting audio, video or both in the settings menu.
You can transfer audio from Final Cut Pro to ADD as individual roles from the roles tab. Select “Audio Only as Separate Files” from the Roles as pulldown.
Bounce
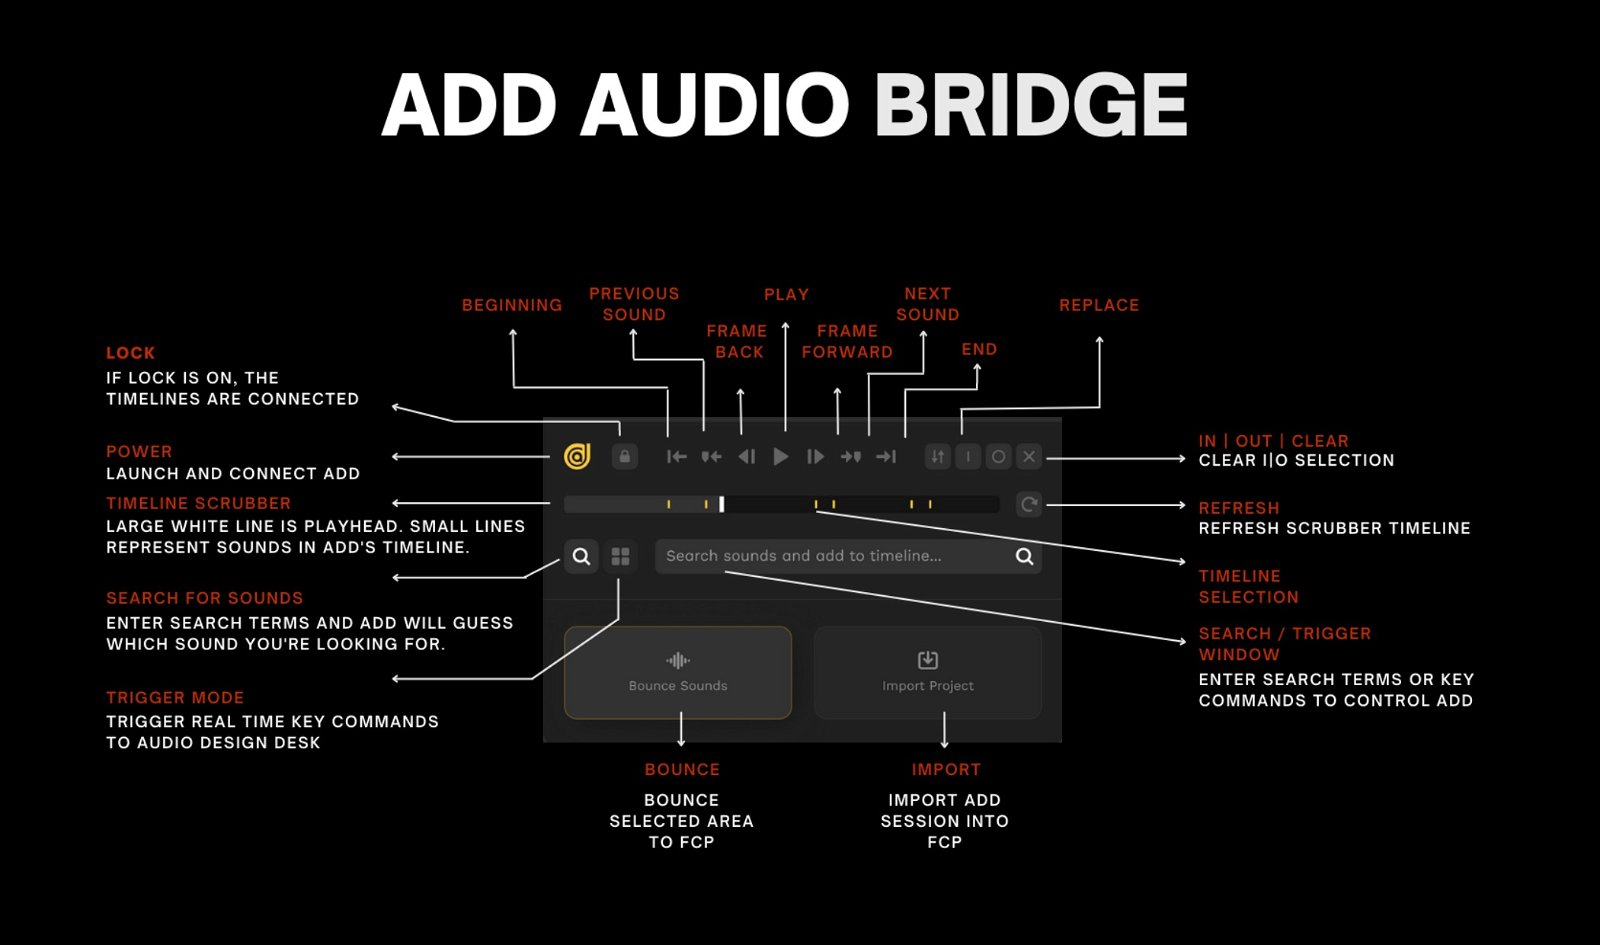
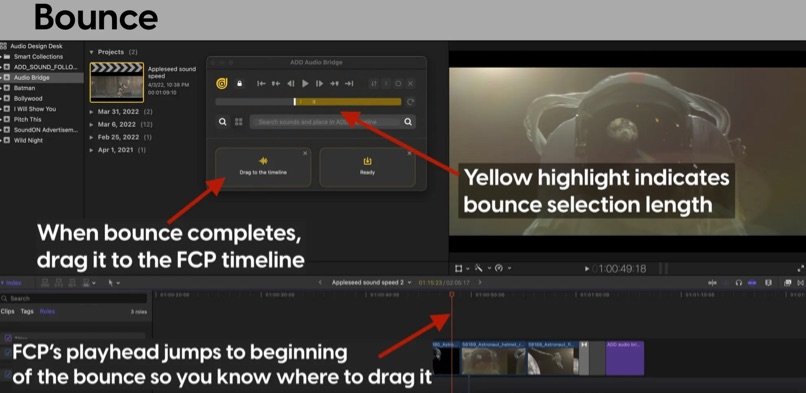
Bounce a selection or your entire project by pressing the Bounce icon in the lower left of the ADD Audio Bridge extension.
Once the bounce is ready it will say “Ready”. The Final Cut Pro playhead will jump to the point where your bounce started so you know where to drag the bounce.
Import
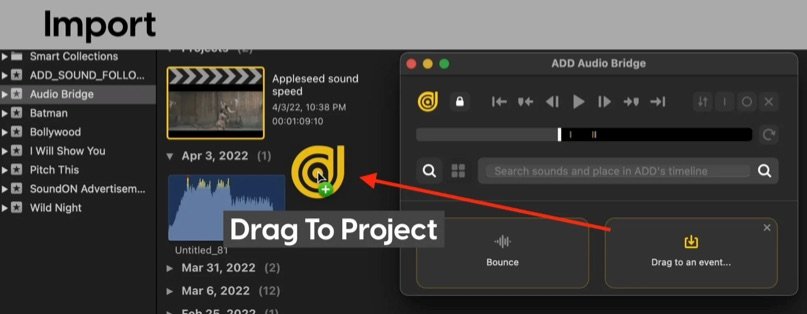
Import your entire ADD sequence into Final Cut Pro by pressing the “Import” button in the ADD Audio Bridge and then dragging the resulting file into the project from the extension.
You may need to click out of a popup that lets you know there are “items with matching names”. In this case, select “Keep Both”.
Once the ADD project is inside of Final Cut Pro, double click on it, select all by pressing ⌘A, copy by pressing ⌘C, double click on your original project, and press ⌘V to paste. All of your audio will appear in sync in your Final Cut Pro timeline.
Controls
There are a few other controls in the ADD Audio Bridge extension including: in, out, clear, go to beginning, go to end, go to previous marker, go to next marker, frame forward, frame back, play, replace and refresh.
_
This extension is new. Please let us know your thoughts by emailing info@add.app.
